

How To Replace A Garden Gate
This article walks you through step by step how to install a close board garden gate. We recommend going for a good quality pressure treated gate which will last years.
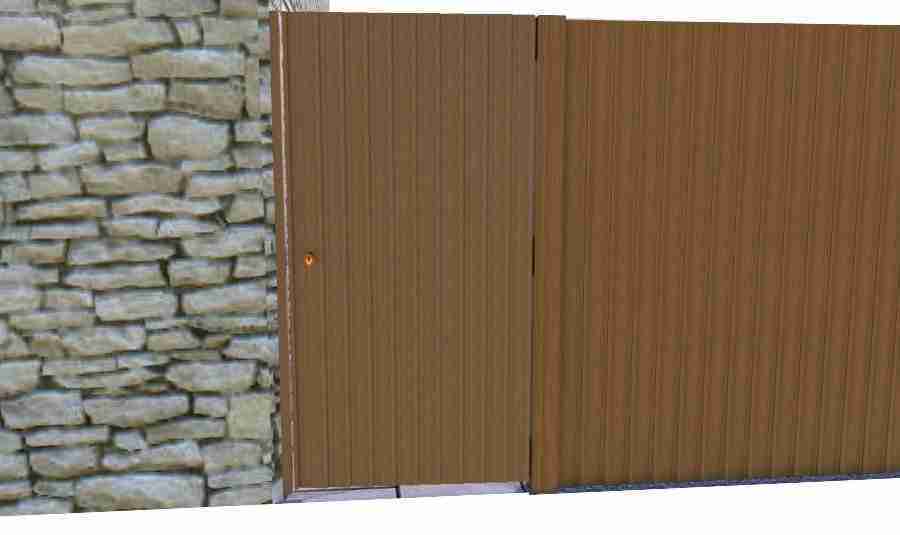
In this example we will be installing a 6ft tall by 3ft wide close board garden gate with a wooden post.
This method will work for slightly larger and smaller gates, for driveway gates and other large gates much stronger posts will be needed to take their weight.
Read next: How to build a close board fence
Click the links to check out our recommendations on Amazon
Tools
- Electric screwdriver/drill
- Post hole digging spade
- 2mm drill bit
- Saw
- Tape measure
Materials
- Hinges
- Gate post
- Close board gate
- Bolt
- Latch
- 50mm screws x 30
- Post mix
Before starting
- Properly measure the gap which the gate need to go into
- Make account of the width of the posts
- Make sure there is some wiggle room (10mm either side)
- Get some help, it can be one by one person but its much faster with two
Step by step guide
1.Install a secure mounting post
The first step to a professional garden gate installation installing a gate post. This post will need to stay at 90 degrees and resit the weight of the gate for years to come so its very important to do it right.
Mark out the position the post making sure to leave enough room for the gate, around a 20mm gap and any posts or batons which are needed at the other side of the gate.
Dig the post hole at least 45cm deep and fill it with concrete or post mix make sure its level so the gate sits vertically when completed.

We recommend using a 100 x 100mm x 2.4m treated timber gate post which has 1.8m above ground and around 60cm buried. Don't worry to much if it is slightly taller than needed as you can always cut of the excess afterwards.
Make sure to use a spirit level during and after the concrete sets so it will be vertical.
Leave the concrete or post mix to set for at least 24 hours
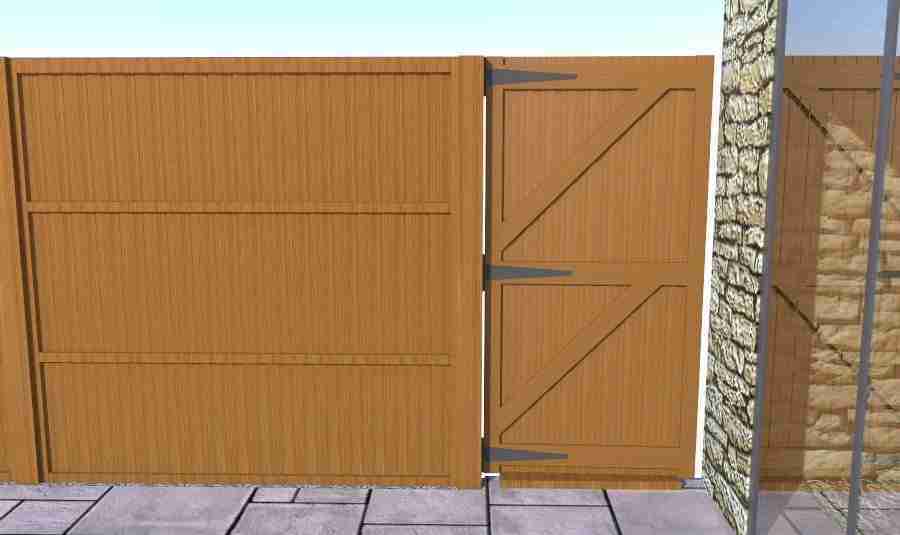
2.Fit the hinges to the gate

With the gate lying stable on the ground fir the gate hinges to the structural wood of the gate.
Place the hinges onto the frame, ensuring that the hinge part overhangs the side of the gate by 10mm. This will create a gap between the gate post and the gate which is necessary for the gate to open properly.

Drill 40mm deep pilot holes where the screws will go, this will prevent any splitting of the wood when the screws are inserted.
Most garden gates will come with the recommended hinges for their design and weight, its always advisable to get something a little stronger than the minimum requirement to ensure there is no sag
Use at least 3 of the screw holes in the hinge when attaching it to the gate. Its sometimes a good idea not to use them all just in case the position of the hinge needs moving later on.
3.Position and fit the gate
When fitting the gate its important to ensure there is enough space for it to move freely both now and in the future. Unfortunately gates sometimes sag over time as the wood ages and hinges warp, this can result in a lowering of the gate so its recommended to plan for this from the start.
Use a piece of wood 25mm thick to create a gap at the bottom of the gate. This will support the gate whilst you fit it to the post and will make sure you get a large enough gap.
Position the gate exactly where you want it to go then check its level with a spirit level. When everything is in line screw the hinges to the post the remove the wood under the gate and check its level again.
If the gate has sagged you may need to make some adjustments to the position of the hinges to counter this sag.
4. Fit the latch and any bolts
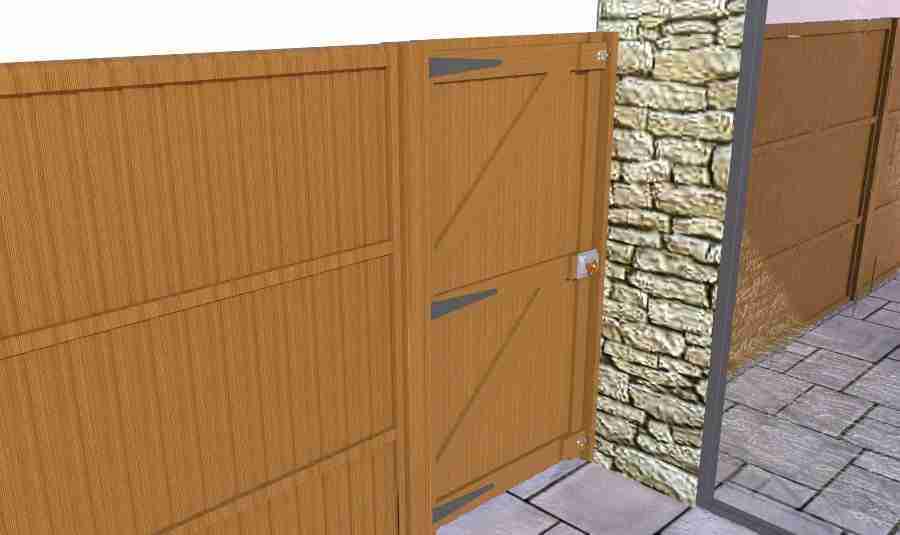
Before you can do this you will need to ensure that there is a wooden post or baton on the opposite side of the gate from the hinges.
If this side of the gate will be going up against a wall you can install wooden baton into the wall with masonry screws. This will hold the inserting fixings for any bolts and latches on the gate.
Depending on the types of latch and locks you are using you may need a wider platform to screw them into than the structural timber of the fence provides.
As you can see in the images we have use 100mm x 20mm pieces of wood to create a wider platform for both the latch and the bolts.
You can install both top and bottom bolts if you are worried about security however a top bolt is all that most people feel they need to keep the gate locked.
Questions
What if to post isn't straight?
If you are installing the gate on an already existing post or a post which is not straight you can still get the gate to sit level.
To do this you can either set the hinges on the gate at a slight angle to offset the angles created by the wonky gate post or you can attempt to straighten up the post.
If you attempt to straighten up the post you will need to dig around the post so you can get a leverage point on it to start to lever it into place. Once its moved enough set it in place with a bit of concrete or some post and fence fixings and then redrill the pilot holes for the hinges.
What if the garden gate sags?
If the gate has sagged, then it's possible that you need to make some adjustments to the position of the hinges. You can do this by hammering the top of the hinge upwards away from the gate or removing and refitting the hinges.
Can I attach a gate to a wall?
Yes but it needs to be strong and you will need to attach a wooden baton or post to the wall. If the wall is weak or crumbly then it is not recommended to add anything to it as this could cause it to fall down.
To attach a gate to a weak wall you will need to built a frame around the gate which can hold its weight instead of the wall.
How long does it take to hang a gate?
Installing a gate takes between 3 and 5 hours depending on your level of skill and what you are installing your gate on. Some gates can be quite heavy so you need to think about how much help you will have and what tools you will use to do the installation.
The time it takes also depends on if you need to install a post and if so what the ground is like underneath.
Do i need to stain my gate?
We recommend staining the gate, this will protect it from the elements and ensure that it remains in good condition for as long as possible.
Over time all garden gates can begin to look a bit worn out, its recommended to stain them every year or 2 years. There are many types of fence stain which can be use so make sure to do your research.
How To Replace A Garden Gate
Source: https://www.acorn-gardening.co.uk/fencing/how-to-install-a-gate-step-by-step/
Posted by: eddythavess.blogspot.com
0 Response to "How To Replace A Garden Gate"
Post a Comment